Importing Customer Records in Batches
You can import multiple customer loan request records from the MARQ™ portal at the same time using the Batch Import feature. This feature enables you to import new records and updated data for records that were previously imported into Lending Cloud.
System administrators control access to the Batch Import feature. The MARQ Portal Integration Functionality Group Settings topic contains information about the fields that add the Batch Import option to the Lending Cloud menu and enable you to use the functionality.
Following is an example of the Lending Cloud menu with the items related to batch importing:
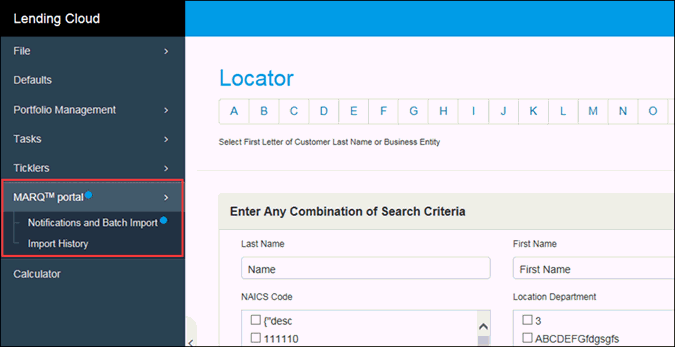
The blue dot to the right of the MARQ™ portal category and the Notifications
and Batch Import link indicate that there are records available to be
imported from the portal.
To import records in a batch submission
1.
From under MARQ™ portal on the Lending Cloud menu, click the Notifications
and Batch Import link.
The Notifications and Batch Import page appears.
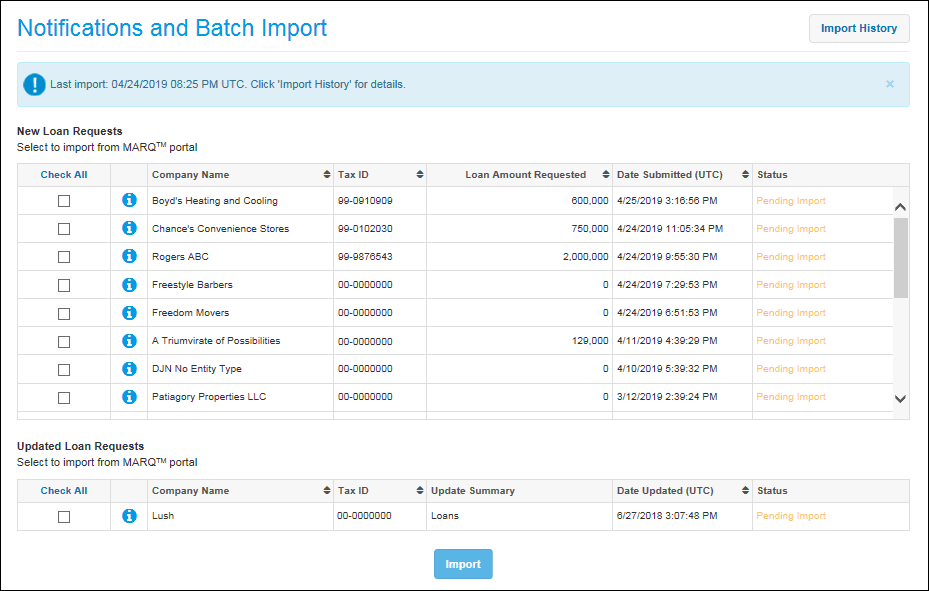
A banner near the top of the Notifications and Batch Import page provides
the date and time when records were last imported into Lending Cloud.
The New Loan Requests section contains loan request records that have
not been imported into Lending Cloud. The Updated Loan Requests section
contains loan request records existing in Lending Cloud with a corresponding
record on the portal that was updated.
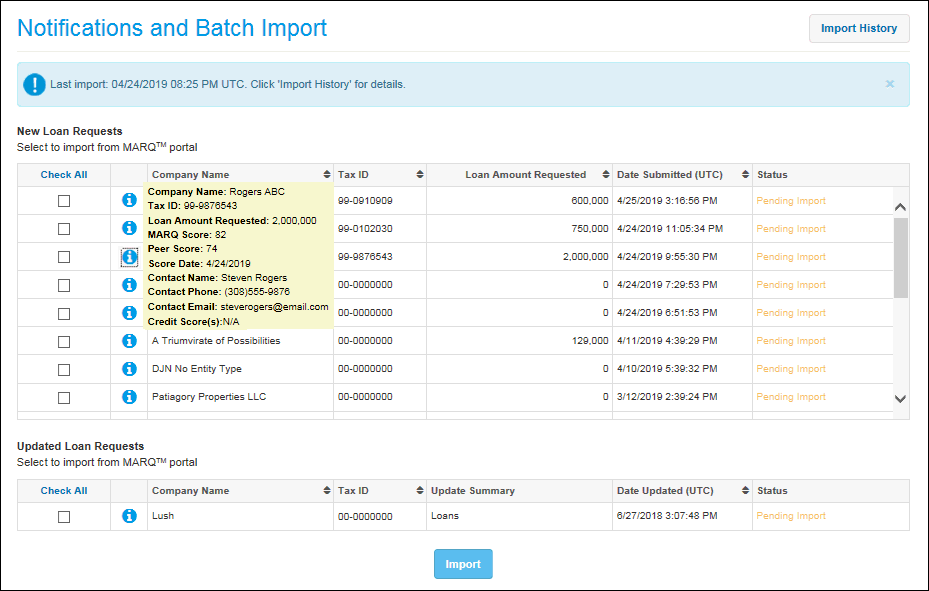
To view more information from a record, click the corresponding  icon to open a pop-up window
with the additional data.
The Status field contains the text Pending
Import until you submit a batch of records for importing.
2.
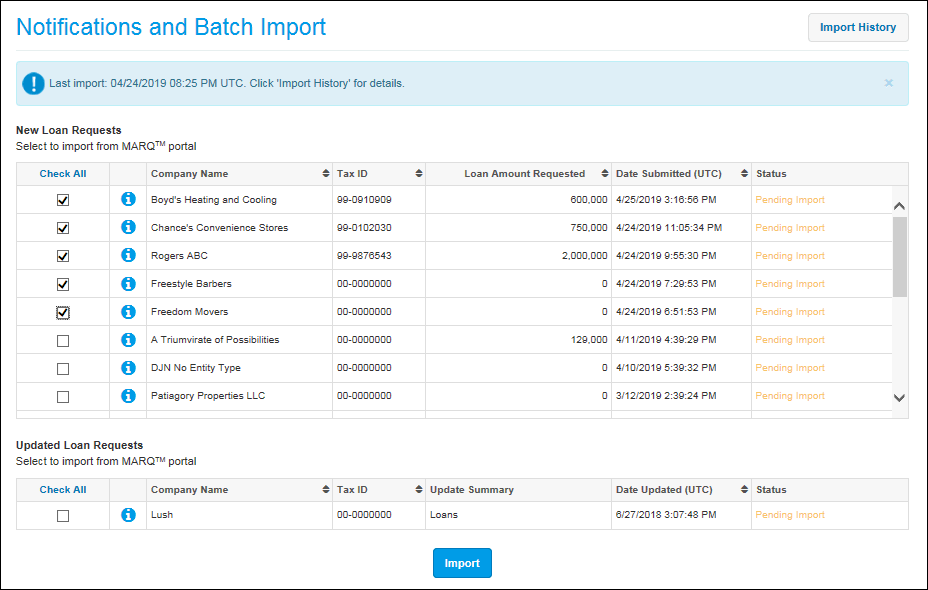
In the Check All column, select
the check box for each new and updated record to be imported. There is
no limit to the number of records that you can import in a single batch.
Note The  icon in the Check All column for a record indicates that another user
is in the record. If you hover your cursor over the column for such a
record,
the
 icon appears, which indicates that the record cannot be updated with new
information from the portal.
3.
After selecting the appropriate records, click the Import
button to start the import process.
Note All the new records selected
for import use the General Information, Balance Sheet, and Income/Expense
models as configured in Defaults
>
MARQ™ portal Import Settings >
Import Wizard Settings.
You can navigate to other pages and perform other tasks in Lending Cloud
while the import process is running in the background.
For each selected record, the status Pending Import is replaced with a
green bar indicating the completion percentage of the import process.
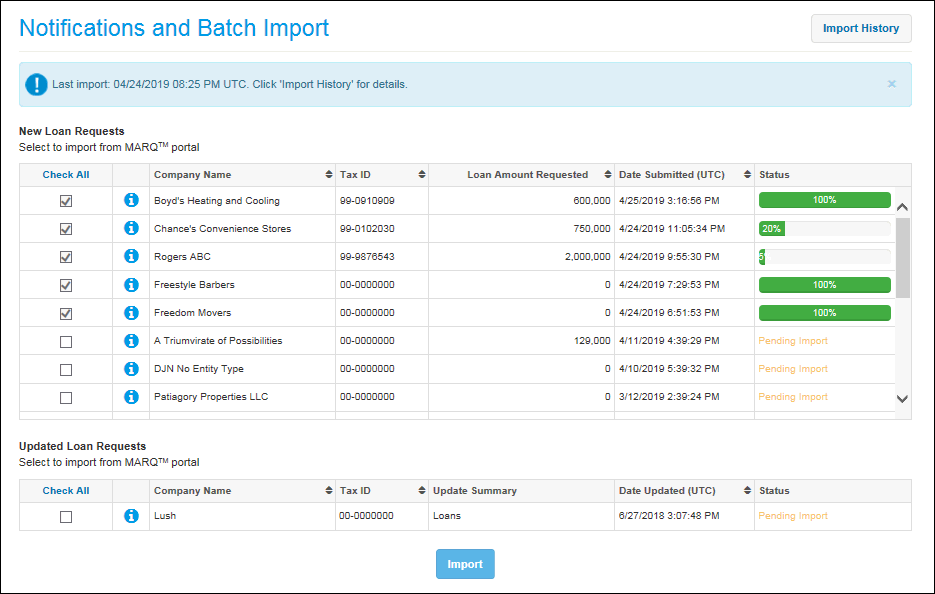
During the import process, a green bar displaying 100% indicates that importing
of the record is complete. If the system detects more than one duplicate
record in Lending Cloud for records being imported, a pop-up window appears.
The window lists the duplicate Lending Cloud records that correspond with
each record to be imported from the portal.
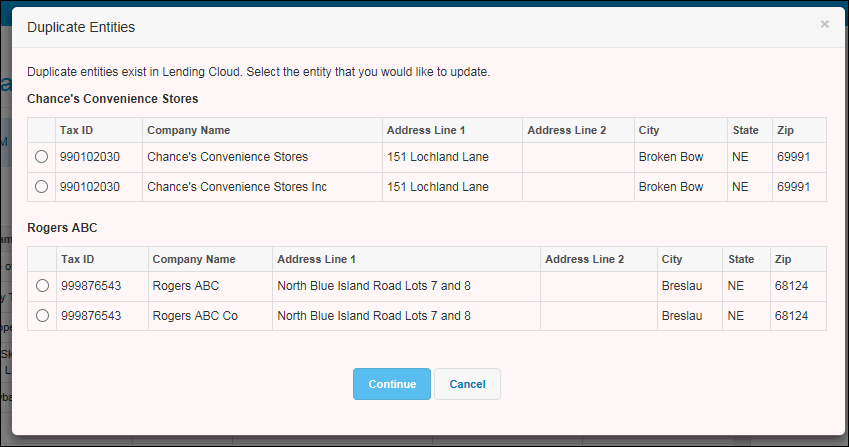
For each portal record in the Duplicate Entities window, you must select
the Lending Cloud record to be updated. Then, click the Continue
button for importing of the records to proceed.
If a record cannot be imported successfully, the text Import Error replaces
the green progress bar in the Status column. Click Import
Error to view error details for the record. To restore records
with errors back to Pending Import status, refresh the Notifications and
Batch Import page.
After the importing of all the records is complete, the system updates
the Import History page with the list of records and each record's import
completion status. The page contains the records that you just imported
and the records that you imported previously.
4.
To access the Import History page, click the Import
History button in the upper-right corner of the Notifications and
Batch Import page.
Note You can also access the
Import History page by clicking the Import
History link under MARQ™ portal on the Lending Cloud menu.
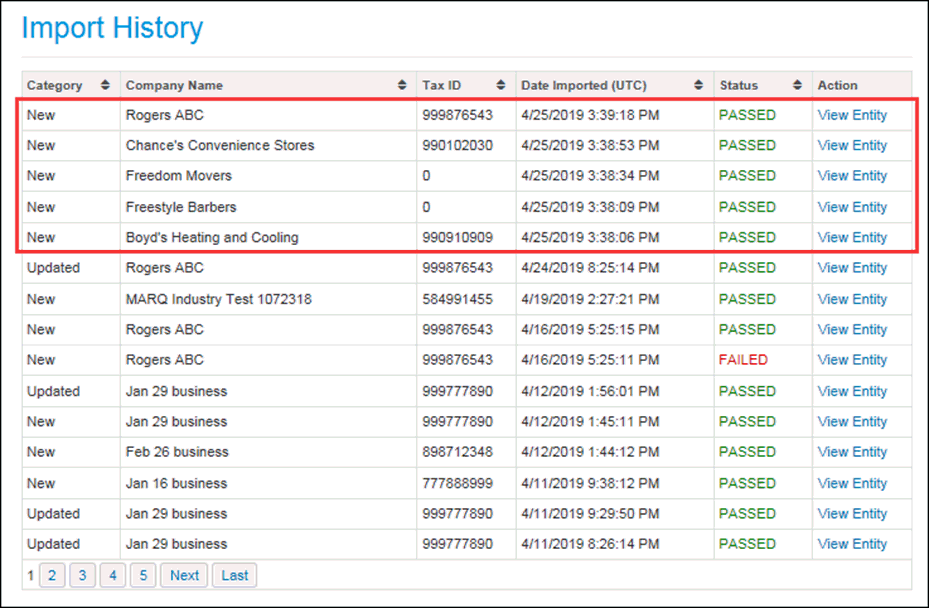
Your most recently imported loan request records appear at the top of the
list. The records imported in this example are bordered by red lines.
For records that were imported successfully, PASSED appears in the Status
column. For records that encountered errors during the import process,
FAILED appears in the Status column. Click FAILED
to view error details for the record. Before resubmitting a failed record
for import, the errors on the corresponding record on the portal must
be resolved.
To access a specific record, click the corresponding View
Entity link in the Action column. The Quick Access page for the
selected record appears.
If you choose to import only one new or updated record from the Notifications
and Batch Import page, you are directed to the standard import process
via the import wizard. To import the record or data successfully, complete
and save each applicable step.
Procedures for importing a new record appear in the Importing
New Customers and Data Using the Import Wizard topic. Procedures for
importing updated data for a record already imported appear in the Importing Data for Existing Customers Using the
Import Wizard topic.
After completing the import process via the import wizard, you are redirected
to the Quick Access page for the customer record.
5. To resolve issues preventing records from being imported completely, access the corresponding records on the MARQ™ portal and make the needed corrections. Then resubmit the records following the procedures in steps 1-3.