Importing Data for Existing Customers Using the Import Wizard
The import wizard enables you to import data that does not exist in Lending Cloud and updated data from the MARQ™ portal into customer records that were already imported into Lending Cloud.
This section contains one option for importing data not in Lending Cloud and updated data from the MARQ portal into existing customer records in Lending Cloud.
In addition to using the procedures in this section, you have the option to access a record in Lending Cloud that you want to update with data from the portal. From the Locator page in Lending Cloud, search for a record associated with one on the portal, or a record previously imported from the portal. Once in a Lending Cloud customer record, you can re-import or update data for it through the wizard using any of the following options from the Lending Cloud menu:
File -> Import MARQ Docs
General -> Related Entities -> Add/Modify/Delete -> Add New -> Search MARQ Repository
Loans -> Search MARQ Repository
Balance Sheet -> Trends Manager -> Import Spreads
Income/Expense -> Trends Manager -> Import Spreads
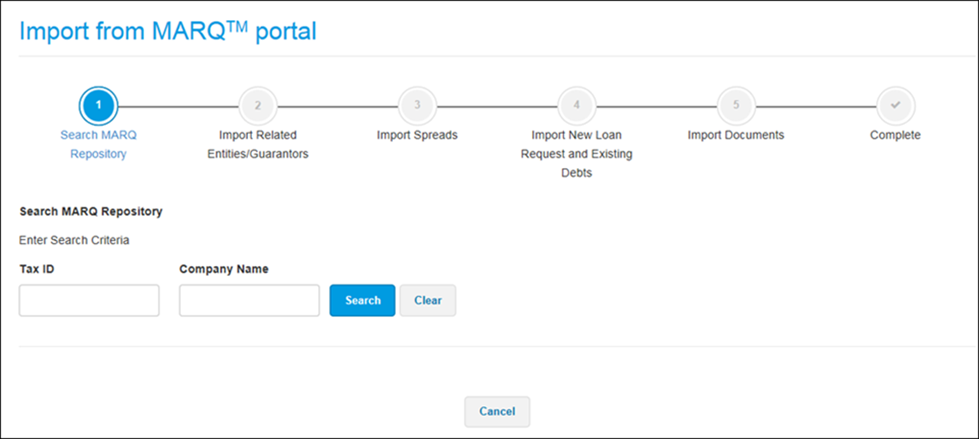
To Import New or Updated Data into an Existing Customer Record
1. From
the Search MARQ Repository page, enter the Tax ID of the business in the Tax
ID field or
the name of the business in the Company
Name field.
The system
searches for the business and performs checks for duplicates
of the Tax ID or the combination of Business Name and ZIP code.
The results of your search appear. The page displays any records with the same Tax ID or Business Name and ZIP code combination.
For
a record already imported into Lending Cloud, the Tax ID field contains
the text, Entity already exists. Also, the Action field contains
the Add as New Customer and
Update Customer links.
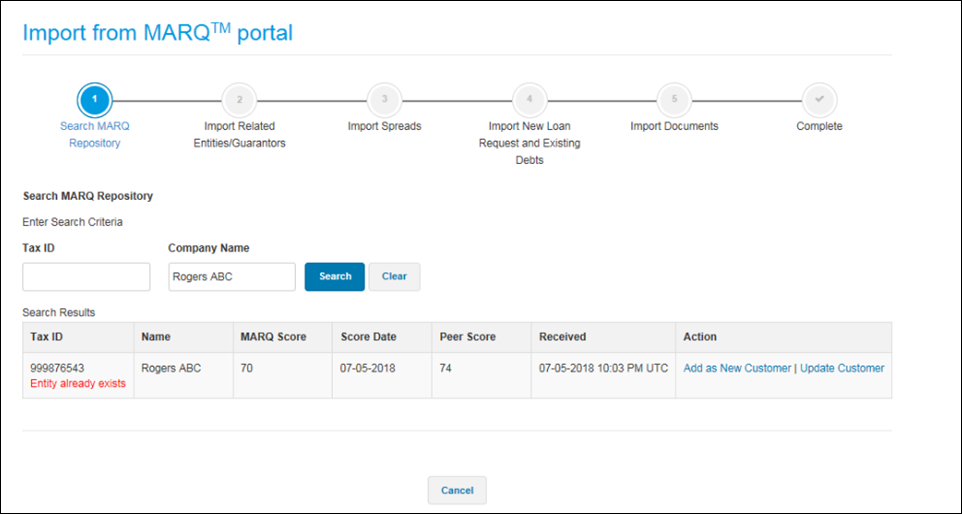
2. If the page lists more than one record, select the one for which you want to import additional information.
3. To create a new separate record that includes the information already in Lending Cloud and the new or updated data from the portal, click the Add as New Customer link. The New Customer Setup page appears. Then, create the new record following the instructions in the Importing New Customers and Data Using the Import Wizard section.
Or,
to update the record with new or updated data from the portal, click the Update
Customer link. If only one duplicate
record exists, the Update General Information
page appears.
If more than one duplicate
record exists, a pop-up window with a list of all duplicate records
appears. Following is an example of the window with records having the
same
Tax ID but a different Business Name and ZIP code.
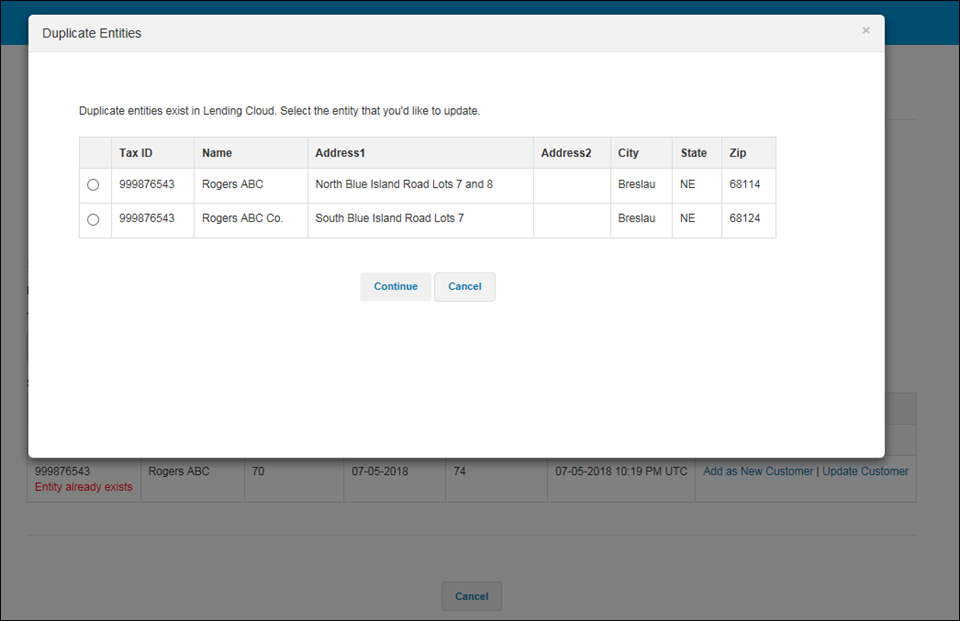
4. From
the pop-up window, select the button for the record for which you want
to import additional information. Then, click the Continue button.
The Update General Information
page appears. The page displays fields with the values found in Lending
Cloud and updated values on the portal. If data for a field
does not exist in Lending Cloud, the Lending Cloud column
is blank.
Note
A blue dot  to the right of the step number
indicates that the step has new data available for importing from the
MARQ™ portal.
to the right of the step number
indicates that the step has new data available for importing from the
MARQ™ portal.
5. From the list in each step with new or updated data, select the check box for the data you want to import, or click the Check All column heading to select all data for importing.
6. Click the Next button to proceed to the next step with new or updated data. From each step, select the data that you want to import.
7.
After selecting the data to import from lists in all applicable steps,
click the Save & Exit or
Save button.
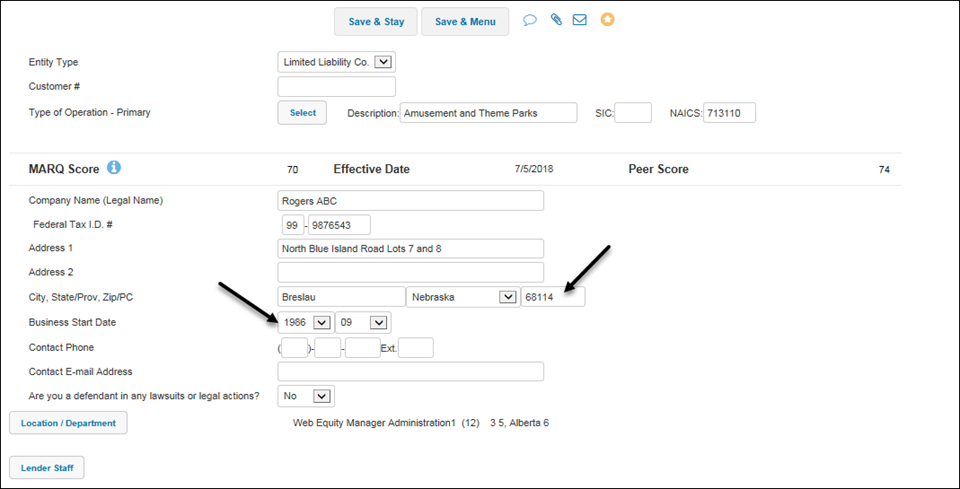
The system imports
the data that you selected into the record in Lending Cloud. The newly
imported data replaces the information that previously existed. Following
is
an example of the updated general information page.
Note If you import all
data listed in a step, the system removes the blue dot
from
the right of the step number on the import wizard. The removal of the
dot indicates all new data has been imported into Lending Cloud.