Using Data Mgr
This section contains information about the following.
- Accessing and Navigating Data Mgr
- Creating and Accessing Queries
- Data Mgr Fields
- Building and Running Queries
- Exporting a Data Mgr Report
- Pre-caching Data Mgr Queries
Accessing and Navigating Data Mgr
You access Data Mgr from the Lending Cloud menu on the Locator page.
To access Data Mgr
Select Portfolio Management > Data Mgr. The Data Mgr query manager screen appears.
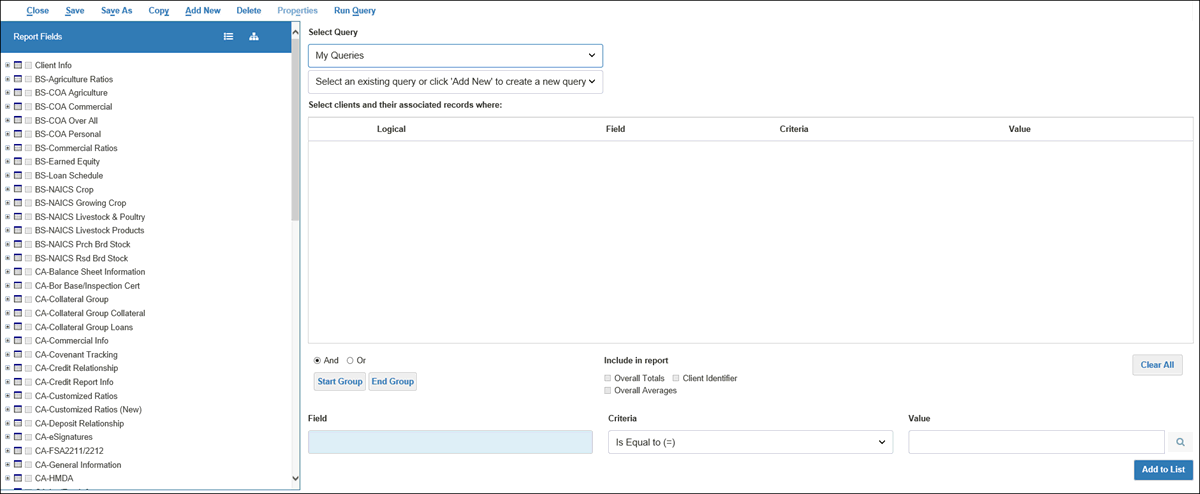
Data Mgr Tool Bar
Items on the tool bar provide you with functionality to create and manage queries and generate query results.

Close - Click to log out of Data Mgr
Save - Click to save the query on which you are currently working.
Save As - Click to save a query under a different name.
Copy - Click to copy the current query.
Add New - Click to create a new query.
Delete - Click to delete a query.
Properties - Click to display a window with information about a selected query.
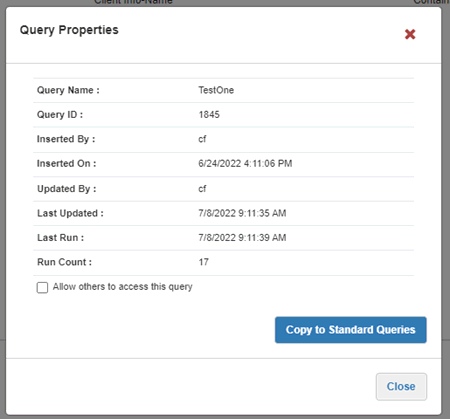
For your queries, use the Allow others to access this query check box to control access. Select the check box to allow other users to access the query. Clear the check box to prevent other users from accessing the query.
Click the Copy to Standard Queries button to copy the query to the Standard Queries.
Run Query - Click to generate the results of the query.
Creating and Accessing Queries
The Data Mgr query manager screen is your starting point for creating and accessing queries.
To start creation of a new query
1. Click Add New in the tool bar to open the Add New Query window.
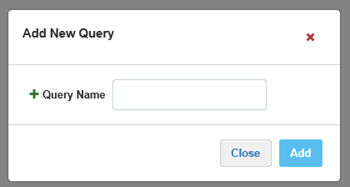
2. Enter the name of the query in the Query Name box.
3. Click the Add button. The system saves the query in My Queries.
To access queries
If there are existing queries in Data Mgr, access them from the Select Query lists at the top-center of the screen.
1. When you select My Queries in the top drop-down list, you can access your queries from the bottom drop-down list.

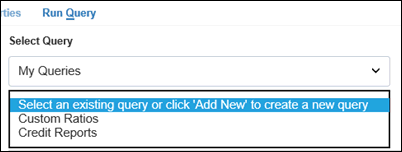
2. When you select Standard Queries in the top drop-down list, you can access the standard queries from the bottom drop-down list.
3. When you select Other Users Queries in the top drop-down list, you can access the available queries of other users from the bottom drop-down list. The bottom drop-down list also enables you to search for and save queries of other users. The system searches for query owners alphabetically by user name.
Data Mgr maintains several thousand data elements for use in queries. The data elements are contained in specific data groups, which appear in the Report Fields pane on the left side of the screen.
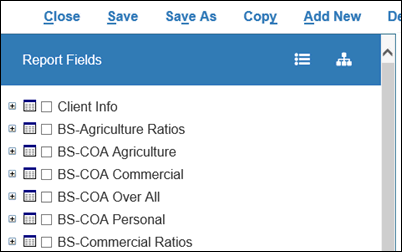
Click the Show All icon  on the right side of the Report Fields banner to display the data elements in all data groups. Click the Hide all icon
  on the right side of the Report Fields banner to display the data groups only.
For each data group, you can display the data elements it contains by clicking the Expand icon  to the left of the group name.
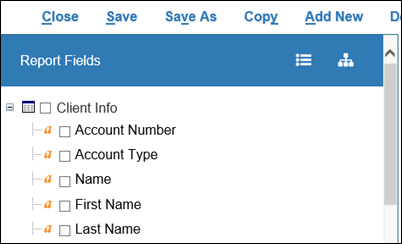
You can retract the display of the data elements in the group by clicking the Contract  icon to the left of the group name.
Use the Data Mgr Data Dictionary to search for Data Mgr data groups and data elements.
Following is information about selecting data elements and characteristics for a query, saving a query, and generating query results.
To build and run queries
After accessing a query, use functionality in the Report Fields pane to include data elements in the query.
1. Click the icon to the left of the check box associated with the data element name or click the data element name to add the element to your query. The element appears in the Field box at the bottom of the screen.

2. To ensure that all information associated with the data element appears in the report, also select the check box to the left of the element name.
3. If you want to include data element information in the report without using the element in your query, only select the check box to the left of the element name.
4. From the Criteria drop-down list to the right of the Field box, select an operator.

5. In the Value field to the right of the Criteria field, enter a value for the data element. Click the Search icon  to open a window that enables you to search for all values for the element that exist in Lending Cloud. Select a value from the list in the search window or enter your own value.

6. Click the Add to List button to place the Field, Criteria, and Value information in the Select clients and their associated records where: window in the middle of the screen.
7. Select the And or Or radio button above the Field box to specify the logic related to elements.
8. To group elements, click the Start Group button above the Field box to mark the beginning "(" of the group. After adding the appropriate elements, click the End Group button to mark the conclusion ")" of the group.
Note Click the Delete icon  on the left side of a line to remove that line from the window.
Click the Clear All button below the window on the right to remove all contents from the window.
9. In the Include in report section above the Criteria field, select the check box for Overall Totals have the overall totals calculated in the report. Select the check box for Overall Averages to have the overall averages calculated in the report. Select the check box for Client Identifier to include the unique identification number for each client in the report. Including the client identifier provides for efficient linking of information from different data groups when you export a Data Mgr report to Excel, which displays each data group on a separate tab.
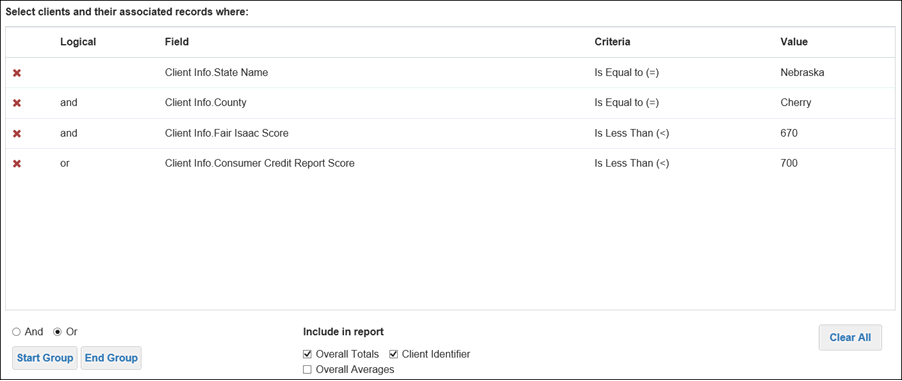
10. After you have added the appropriate Logical, Field, Criteria, and Value information, and selected the appropriate Include in report options, click Save in the toolbar to save the query.
11. Click Run Query in the toolbar to generate the query results. The Data Mgr report screen opens in a new browser window.
Data Mgr Report Screen
Following is an example of the Data Mgr report screen in a Google Chrome™ web browser:
Note If a query produces a large number of records, exporting the results to Excel might enable you to review and filter the information more efficiently. See To export a Data Mgr report.

Use the icons and drop-down lists in the toolbar at the top of the screen and the scroll bars at the bottom and right side of the screen to navigate through the report.
Data Mgr Report Data Tabs
The data groups from which you selected elements for a particular query determine the tabs that are part of the report.

To close the Data Mgr report screen, click the X in the upper-right corner of the browser window tab.
The Data Mgr report screen enables you to export a report.
Click the Export icon  in the toolbar at the top of the Data Mgr report screen to export the report to Excel. Each data group appears on a separate tab in Excel.
If you experience difficulty in opening the Excel file produced by the export from Data Mgr, take the following steps:
1. Save the exported file.
2. Open Excel.
3. Use Excel to open the exported file.
If your system administrator has set up the Data Mgr pre-cache query option, you can select which queries are pre-cached to generate data for their related reports. After you select a query to be pre-cached, the nightly Data Mgr upload will first upload all appropriate data for your financial institution and then will pre-cache the report.
Note Pre-caching impacts overall Data Mgr processing and is intended only for complex queries that take an excessive amount of time to finish. Results will vary based on your institution's database and the query being used. If you want to use pre-caching, Moody's recommends that you work with Moody's Client Service to select queries and monitor the impacts and benefits of this option.
Selecting Queries for Pre-caching
You designate a query for pre-caching by setting a field on the Data Mgr query manager page.
To select a query for pre-caching
1. On the query manager page, use the two drop-down lists under Select Query to access the applicable query.
2. After the query opens, locate the Pre Run Report field near the lower-right corner of the page.

3. Select the Pre Run Report check box.
4. Click Save in the upper-left corner of the page to pre-cache the query. A pop-up window confirming your change appears.
To set up the Data Mgr pre-cache query option, system administrators use the procedures in Activating Pre-caching for Data Mgr Queries.