Defaults
System Administration | Locations and Departments
On the Locations / Departments screen, you can create locations for your organization that identify the branch offices and departments within those branch offices. Customer records can be assigned to a location. Locations, in turn, can be assigned to customer access workgroups. Administrators can define departments or branch locations within customer access workgroups to restrict access by users and effectively partition the database.
Customer records can be moved from one location to another. For example, if one location is closing, you can move the customer records from that location to a new location. Once the customer records are moved, you can delete the former location. See Move a Location on page 4 for instructions on how to move a location. In addition, users can be given access to more than one location. For example, loan approvals for customers can be worked by any user that has been given access to the customer record, regardless of their assigned location or physical location.
Add a Location
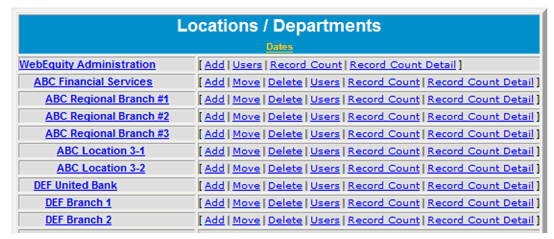
A parent location is the level above the child location. For example, in the following figure, ABC Regional Branch #3 is the parent location and ABC Location 3-1 is the child location. To add a location or department, find the parent location on the Locations / Departments screen under which you want the new location to reside and do the following.
1. Click Add next to the parent location description.
2. Enter a description of the location in the Location Name field. Notice that the right side of the dialog box is blank. The default hyperlinks will appear in that area once after you have added a location.
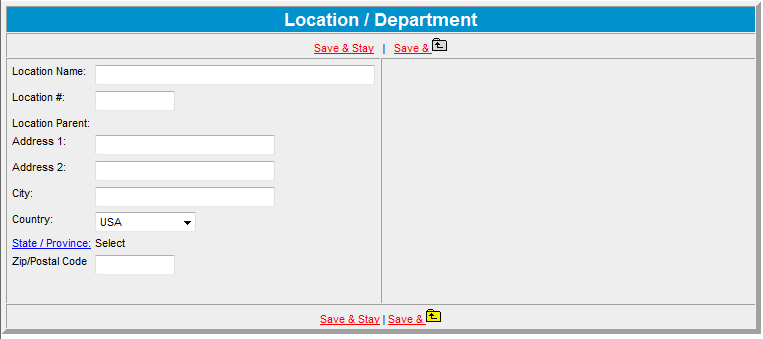
3. Enter a location number (Example: LOC1BR1) in the Location # field. A location number is a user-defined, alpha-numeric code. It appears in the Lender Information section of the General Information screen.
4. Enter the address, city, country, Zip or postal code of the current location.
5. Click State / Province and select from the dialog box that appears.
6. Click Save & Return to return to the main Locations / Departments screen.
Defaults to Use in this Location
After you have added a location, the default links that apply to this location appear on the right side of the dialog box. Use the default links to set up the defaults for this location. Note: If you want the defaults to only apply to the current location, use the submenus on the Defaults menu.
Click directly on the links on the graphic below for a description of these default sections.
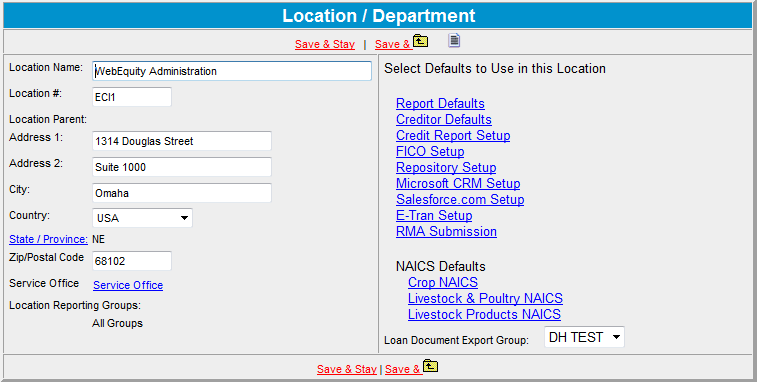
Note: If the location you are adding or viewing has been assigned to a location reporting group, the groups will appear in the lower left corner of this screen. The groups will not appear if the location has not been assigned to a location reporting group. When you are finished, click Save & Return to return to the main Locations / Departments screen.
Move A Location
Use the follow procedure to move customer records from one location to another, such as in the case of a branch office closing. To move a location, do the following.
1. On the Locations / Departments screen, click Move next to the location you want to move.

2. On the Move Location screen, click Lookup and select the destination location from the dialog box. The location ID is noted next to the location descriptions.
Note Lending Cloud will automaticaly assign a Location ID for you. Locations IDs are used to help you easily move the position of your locations and departments within the Location and Department's structure..

3. Click Save & Return to return to the main Locations / Departments screen.
Delete a Location
Click
Delete
to delete a location.
Record Count
Click
Record Count
to show how many customer records are in the system.
Record Count Detail
Click
Record Count Detail
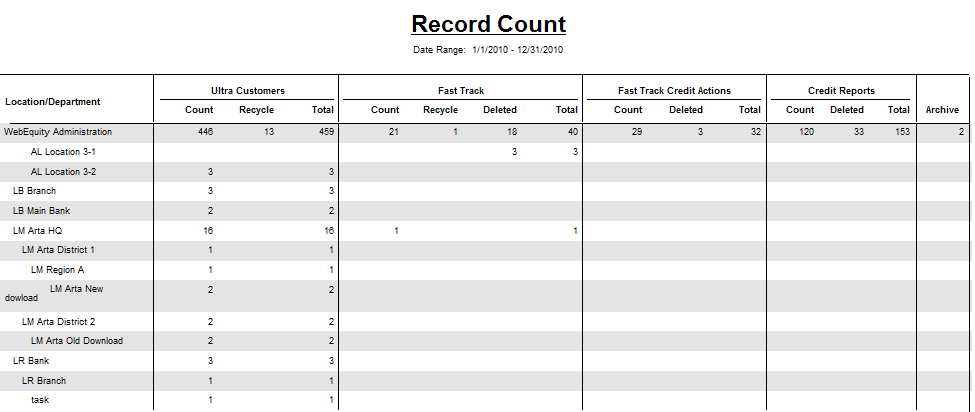
to show the total number of customer records by type for a specific location and period of time. The total number of records are shown at the bottom of the report.
Note: While these links are per location, you can get an aggregate record count for all locations using the Dates link at the top of the main Location /Departments screen.
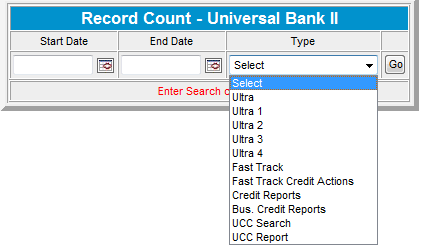
1. Click Dates .
2. In the Record Count dialog box, enter or select the start and end dates from the pop-up calendars.
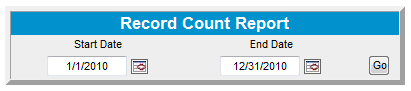
The Record Count report shows the number of customer records entered for the time period (1/1/2010 to 12/31/2010).
Find/Replace Locations
Use the Find / Replace Location screen to manage your locations.
1. Click Replace Location Select to find the name of the existing location you want to replace. When you click on that location's link, it will automatically appear in the Location area.
2. Click With Select to find the location you want as the replacement. When you click on that location's link, it will automatically appear in the Location area.
3. Click Update and the system will make the change and confirm the replacement.

Continue to the next step of this process -- Customer Access Workgroups