Manually Adding Tax Forms
When adding a tax form, if the customer file's default account type is set to Agriculture or Commercial, all forms (1040, 1065, 1120, 1120S) are available. If the default account type is set to Personal, only the 1040 forms are available. This setting is located in the Balance Sheet or Income/Expense - Chart of Accounts - Default drop- down (Ag, Com, Pers). Tax forms that are added are referred to as packages.
To add and map tax forms
1. From the Lending Cloud menu, select Tax Forms. The Tax Forms page appears.
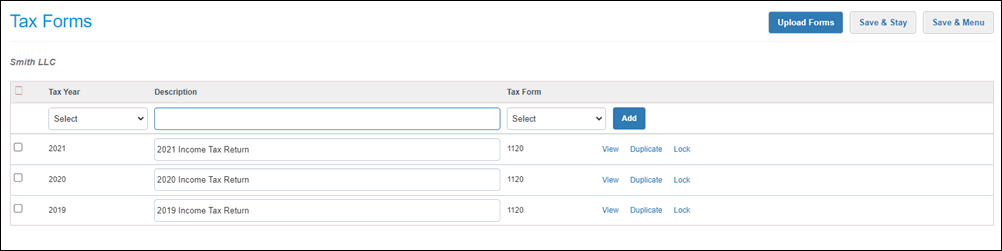
2. In the Tax Year drop-down list, select the appropriate year.
Note Forms and schedules for the latest tax year and the previous six years are available. For example, if 2024 is the latest tax year, 2024 appears at the top of the the drop-down list followed by 2023-2018.
3. In the Description box, enter a description of the form.
4. In the Tax Form drop-down list, select the appropriate form.
If you select form 1040, a list of supporting forms appears under the entry fields row. Select the check boxes of forms to be included with your 1040 form package. If you select any of the other forms from the Tax Form drop-down list (1065, 1120, or 1120S), the related supporting forms are automatically included in the package.
Note Select only the necessary supporting forms as each extra form included impacts the time required to generate and load the tax forms.

5. Click the Add button. The Tax Form Package page appears.
Note The Map To drop-down list defaults to the customer type (Ag - Agricultural, Com - Commercial, or Pers - Personal). You can change this setting to map data to Agricultural, Commercial, or Personal charts of account on the balance sheet or income/expense statements. The availability of the Map To drop-down list and the available options within the list depend on the form that is displayed.
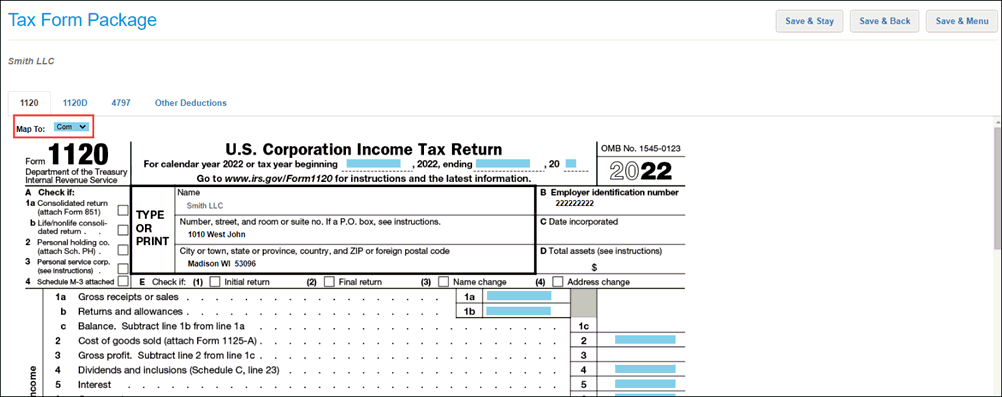
6. Enter information into the blue highlighted fields. Clicking on a blue field changes it to yellow, indicating that you can enter information. The supporting forms that you added, or that were automatically added, are accessible as tabs above the main form.
7. Click one of the following buttons.
-
-
Save & Stay - This option saves your changes, adds the form as a package on the Tax Forms page, and keeps you on the Tax Form Package page.
-
Save & Back - This option saves your changes, adds the form as a package on the Tax Forms page, and returns you to the page on which you were previously working.
-
Save & Menu - This option saves your changes, adds the form as a package on the Tax Forms page, and returns you to the Lending Cloud Quick Access page.
-
For information about actions that you can take on established tax form packages, see Managing Existing Tax Form Packages.
For a pre-existing tax form entered in Lending Cloud that is from a year not listed in the Tax Year drop-down list, the form is read-only. No functionality is supported for the form in any other area of Lending Cloud.
For information about uploading tax forms to Lending Cloud, see Uploading PDF Tax Forms.