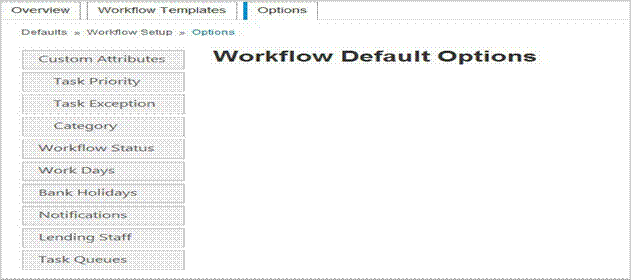
Workflow Setup - General Settings
Use the following navigation to access the general settings for the Workflow module:
Defaults > Workflow/Ticklers >General Settings
Search Behavior - Controlling Population of the All Workflow and All Task Lists
You can control whether the All Workflows list, the All Tasks list, or both lists are populated when users access the associated page(s).
Preventing the population of the lists provides users with quicker access to the pages. Moody's highly recommends this option for sites that have a high volume of workflows and workflow tasks, as users will experience far less wait time for the page to open.
Note The system initially selects the check box for the Use saved search as default behavior for All Workflows and Use saved search as default behavior for All Tasks items on the Search Behavior page, which populates both the All Workflows list and the All Tasks list.
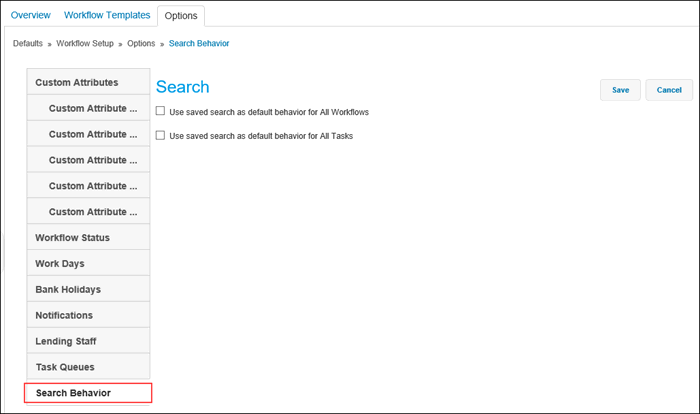
The following options are available to prevent the population of lists and reduce the time it takes users to access the All Workflows page and/or the All Tasks page.
1. To prevent population of only the All Workflows list, clear the check box for Use saved search as default behavior for All Workflows on the Search Behavior page.
2. To prevent population of only the All Tasks list, clear the check box for Use saved search as default behavior for All Tasks on the Search Behavior page.
3. To prevent population of both lists, clear the check box for each item on the Search Behavior page.
4. After making the appropriate selection(s), click the Save button.
Note After the initial display of the All Workflows or All Tasks page with no records, the list will not retrieve data until the user selects a saved search or creates filters and selects Search. When filtering, users must select an option from the Status drop-down list to execute the search successfully.
Custom Attributes
Custom attributes are optional drop lists that can be configured to represent information about Tasks, such as their category or priority.
Take the following steps to add a custom attribute:
1. Select the Custom Attributes section from the menu.
2. Enter the label for the custom attribute.
3. Select where the Attribute should be editable.
Custom attributes with the Edit On Template option selected will be able to have a value set for each task within the Workflow Template. Custom attributes with the Edit On Instance option selected will allow users to select and change values on Tasks within Workflows that are running in customer records. Once the attributes have been set up, the user will be able to add values by clicking the menu items on the left side of the screen.
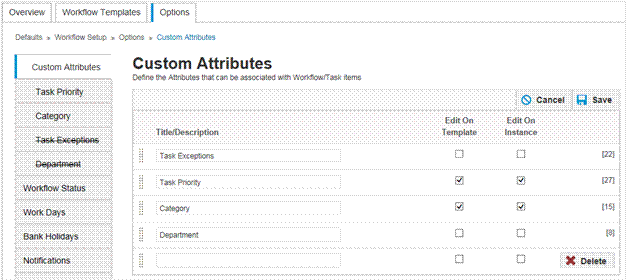
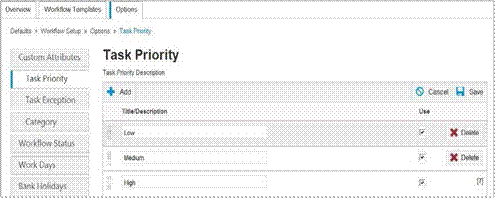
Custom Attribute Values: For each custom attribute, the System Administrator has the ability to add, delete, or modify the values for that attribute at the default level to meet the institution’s needs. In this example, the custom attribute “Task Priority” has been added, and a set of values have been defined.
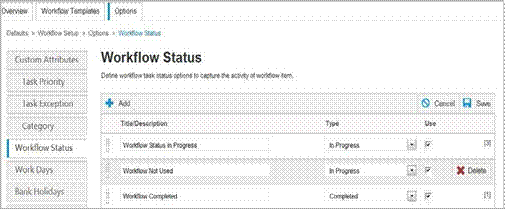
Workflow Status
Workflow statuses are used to track the progress of Workflows, for reporting, and to determine when a Workflow is complete. When a Workflow is set to a status with an ‘In Progress’ Type, the Workflow will be active. Changing the status to one with a ‘Completed’ Type will mark any remaining Tasks as skipped and will archive the Workflow.
Work Days
Work days determine what days will count toward start and due dates when the Workflow generates those dates. By default, Monday through Friday are selected as work days.
Scheduling Conflicts determine what the system does when start due dates fall on non-working days, either move the date to the previous day or to the next work day. By default,all are set to move the dates to the next work day.

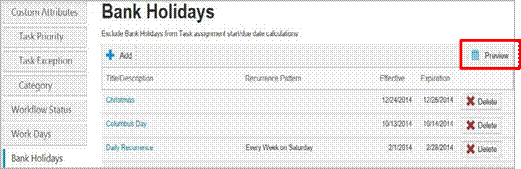
Bank Holidays
This option allows system administrators to exclude bank holidays from start and due date calculations. By clicking the Preview button, the user has the ability to view the calendar by day, week, month, and agenda.
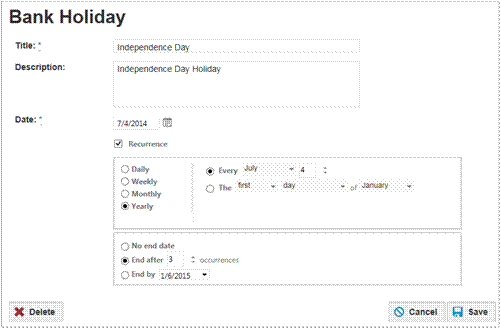
Each bank holiday must be given a title as well as a date for the holiday. Optionally, a description can be added. Bank holidays can be set to reoccur if desired. In the example below, Independence Day has been setup as a holiday that begins July 4th, 2014 and reoccurs every July 4th for three years after.
Notification Settings
Notification options can be controlled by a system administrator from the Defaults menu. Workflow Notifications can include daily summary emails regarding past due and upcoming past due Workflow information sent to Assignees, Account Managers, Project Managers, or Queue Members.
*To receive notifications users must have a validated email address*
To setup Workflow Notifications go to:
Defaults > Workflow/Ticklers> Notification Settings
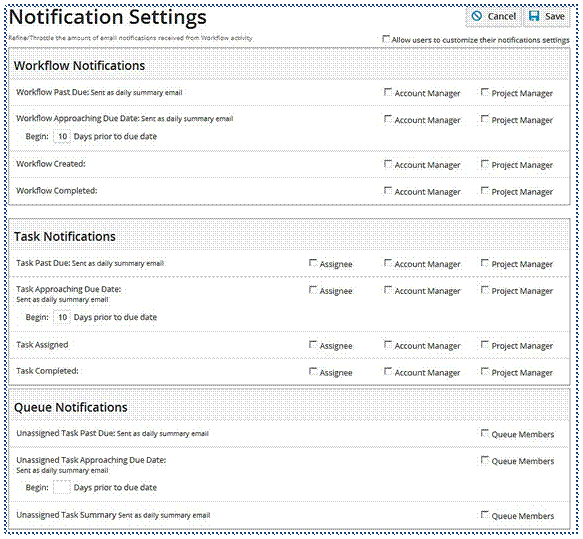
To allow users to customize their notification settings, click the check box at the top of the Notification Settings screen.
Workflow Notifications:To enable Workflow Notifications, click the check boxes to allow daily summary email notifications for the Account Manager and/or Project Manager. Notifications can also be set up for Account Managers and/or Project Managers when a Workflow is created or completed.
-
To have a daily summary email sent for any Workflows past their due date, click the check box for Workflow Past Due.
-
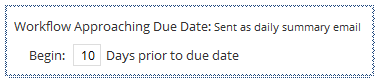
To have daily summary emails sent for any Workflows with an upcoming due date, click the check box for Workflow Approaching Due Date.
-
-
Set the Begin field to how many days prior to the Workflow’s due date the Workflow should be included in the daily summary email.
-
-
To have emails sent anytime a Workflow is created or completed, click the check boxes for Workflow Created and/or Workflow Completed.
Task Notifications:To enable Task Notifications, click the check boxes to allow daily summary email notifications for the Assignee, Account Manager, or Project Manager. Notifications can also be set up for Account Managers and/or Project Managers when a Task is assigned or completed.
-
To have a daily summary email sent for any Tasks past their due date, click the check box for Task Past Due.
-
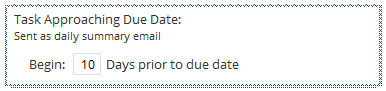
To have a daily summary email sent for any Tasks with an upcoming due date; click the check box on Task Approaching Due Date.
-
-
Set the Begin field to how many days prior to the Task’s due date the Task should be included in the daily summary email.
-
-
To have emails sent anytime a Task is assigned or completed, click the check boxes for Task Assigned and/or Task Completed.
Queue Notifications:To enable Queue Notifications, click the check boxes to allow daily summary email notifications for the Queue Member.
-
To have daily summary emails sent for any unassigned Tasks past their due date, click the check boxes on Unassigned Task Past Due.
-
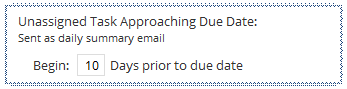
To have daily summary emails sent for any unassigned Tasks with an upcoming due date; click the check boxes on Task Approaching Due Date.
-
-
Set the Begin field to how many days prior to the unassigned Task’s due date the daily summary emails should be sent.
-
-
To have daily summary emails sent including all unassigned Tasks, click the check box for Unassigned Task Summary.
Lending Staff
Lending staff allows the bank to define roles for users in system based on their job functions. Using lending staff allows for Workflows to automatically assign users to Tasks based on their role in the bank and within the process.
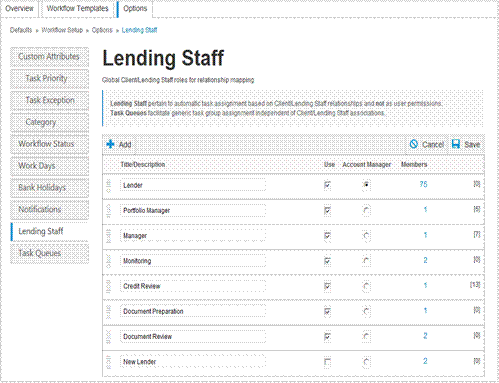
One role must be selected as the Account Manager role. Users added to this role will be marked as the Account Manager when those users are associated with a customer record.
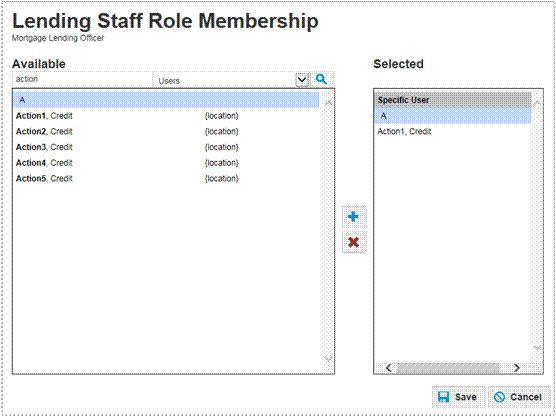
To add users to a role click the number of members link in the desired role’s line. This will open the user selector. Use the search function at the top of the left box to find the desired user. Click the user’s name in the left box, and then click the ![]() button to add the user to the role. To remove a user from the role, click the user’s name in the right box, and then click the
button to add the user to the role. To remove a user from the role, click the user’s name in the right box, and then click the ![]() button to remove the user.
button to remove the user.
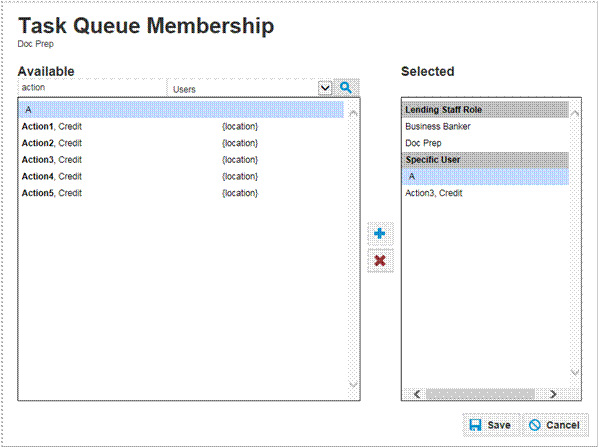
Task Queues
Task queues can be used to assign Tasks to a group of users in which any of the users can view the queues and select Tasks that they have the capacity to complete.
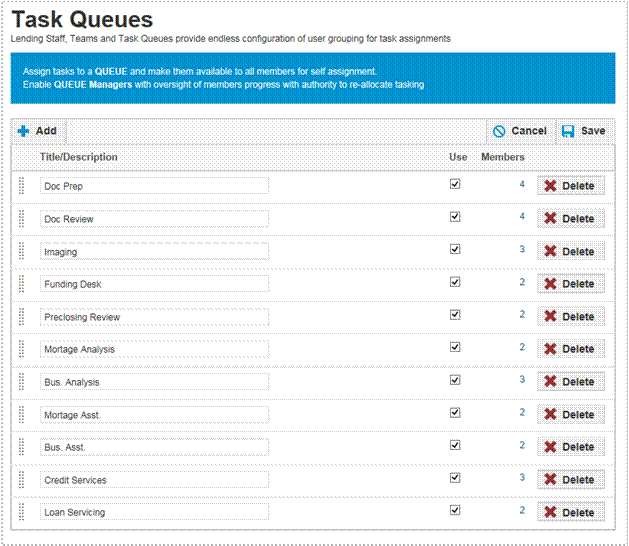
To add users to a queue click the number of members link in the desired queue’s line. This will open the user selector. Use the search function at the top of the left box to find the desired user. Click the user’s name in the left box, and click the ![]() button to add the user to the queue. To remove a user, click the user’s name in the right box, and click the
button to add the user to the queue. To remove a user, click the user’s name in the right box, and click the ![]() button to remove the user from the queue. Additionally, lending staff roles can be added to the queue. Using this option will automatically add any user in the selected role to that queue.
button to remove the user from the queue. Additionally, lending staff roles can be added to the queue. Using this option will automatically add any user in the selected role to that queue.