Tickler List Searches
The following screens enable you to search tickler lists, and view, organize, and export search results.
My Ticklers
This screen provides access to all ticklers assigned to you.My Tickler Queues
This screen provides access to any tickler queues of which you are a member.All Ticklers
This screen provides access all ticklers.Tickler Queues
This screen provides access to all tickler queues.
See Executing Searches for information about creating search criteria and generating search results.
Note After you execute a search, the system returns a maximum of the first 500 records that match the filtering criteria. The 500-record limit enables servers to perform more efficiently during search processing. If your filtering criteria is likely to return more than 500 records, you can split the larger search by executing searches with more limited criteria so expected results do not exceed 500 records.
My Ticklers
To access this screen, navigate to the Locator screen. In the Lending Cloud menu, select Ticklers > My Ticklers.
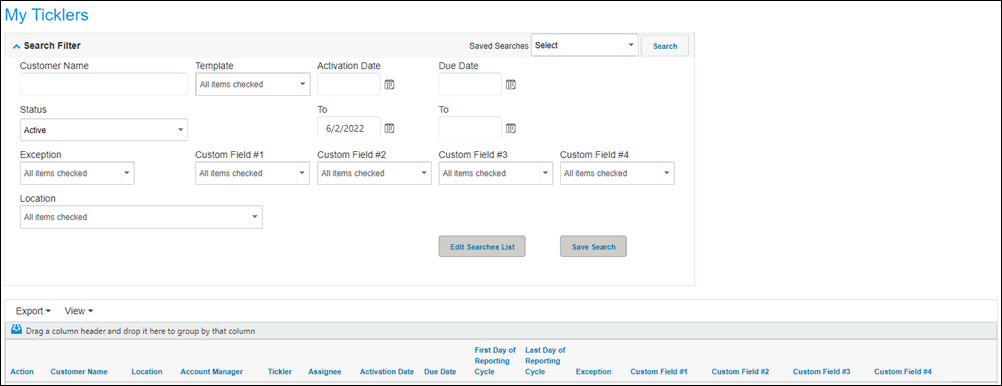
To close a tickler, click the Close button in the Action column.
My Tickler Queues
To access this screen, navigate to the Locator screen. In the Lending Cloud menu, select Ticklers > My Queues.
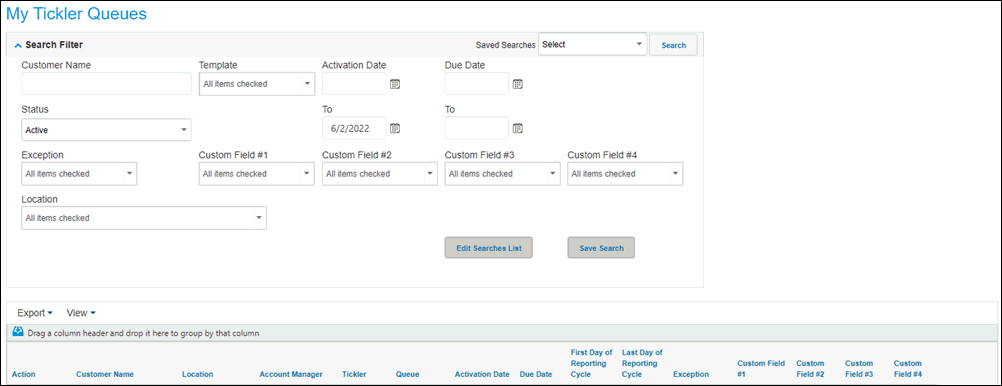
To claim a tickler, click the Claim button in the Action column. After you claim a tickler, it is included in your My Ticklers list.
All Ticklers
To access this screen, navigate to the Locator screen. In the Lending Cloud menu, select Ticklers > All Ticklers.
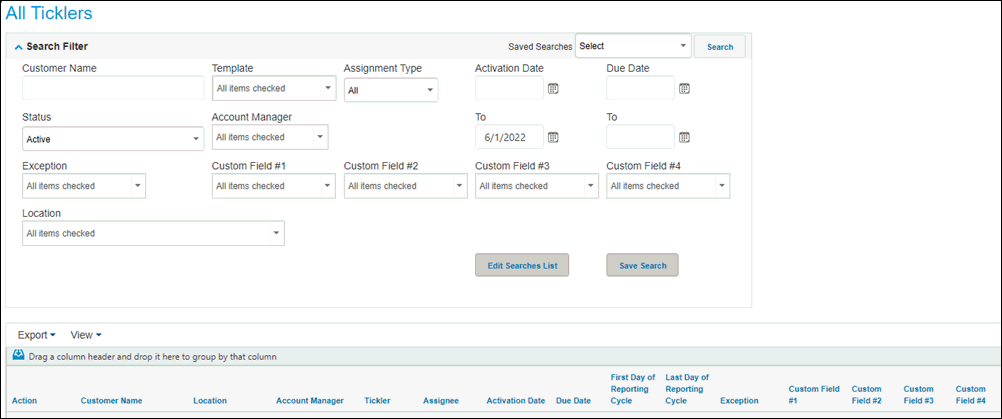
To claim a tickler, click the Claim button in the Action column. After you claim a tickler, it is included in your My Ticklers list.
Tickler Queues
To access this screen, navigate to the Locator screen. In the Lending Cloud menu, select Ticklers > All Queues.
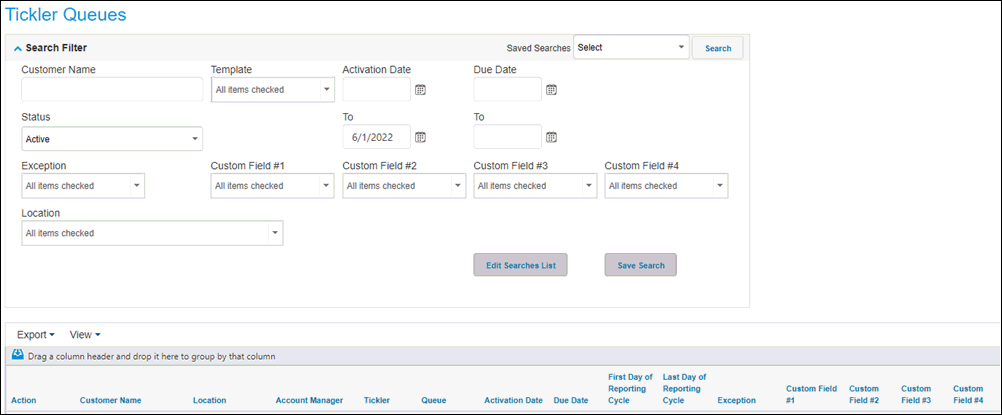
To claim a tickler, click the Claim button in the Action column. After you claim a tickler, it is included in your My Ticklers list.
To execute a search, access the applicable screen and complete the Search Filter fields as needed. Then click the Search button.
Note After you execute a search, the system returns a maximum of the first 500 records that match the filtering criteria. The 500-record limit enables servers to perform more efficiently during search processing. If your filtering criteria is likely to return more than 500 records, you can split the larger search by executing searches with more limited criteria so expected results do not exceed 500 records.
Saving Searches
The following fields enable you to save searches.
• Save Search—Click this button to save the values that you have entered in any of the filter fields for future use. The Save Search Title dialog box appears enabling you to enter a name for the search.
• Saved Searches—Use this drop-down list to access the searches that you have saved. You can also use the Create New option in this list to create saved searches. When using this option, the filter fields are cleared enabling you to enter values. You then click Save Search to complete the action.
• Edit Searches List—Click this button to display the Searches List dialog box. This dialog box enables you to edit saved search titles or delete the searches.
Note You will only see your saved searches. When you access one of the screens in future sessions, the last saved search that was used appears with the filter fields automatically populated. Also, the last column selections that were set in the View drop-down list determine the layout of the search results table.
Presenting Data
The tickler screens enable you to control the type and arrangement of data that appear in the search results table.
To configure the presentation of tickler data
1. Click View in the upper-left corner of the table.
2. In the Hide / Unhide Columns drop-down list, select the check box for each column that you want to appear. Clear the check box for each column that you do not want to appear.
3. To move or reorder columns, click the header of each appropriate column and drag it to the desired location.
4. To sort the results by column, click the appropriate column header.
5. To group the results by column, click the
appropriate column header and drag it to  near the
upper-left column of the table. The system places the name of the column
in that location and groups the data accordingly.
near the
upper-left column of the table. The system places the name of the column
in that location and groups the data accordingly.
Exporting Data
The tickler screens enable you to export search results.
To export tickler data
1. Click Export in the upper-left corner of the table.
2. In the drop-down list, select Excel, PDF, or Word.
3. Save the exported file to the appropriate location on your computer.