Ticklers Templates
Go to Defaults>Workflow/Ticklers>Tickler Setup
Click on the Templates tab. There are no Templates by default.
To add a Template
Select the Add.
Fill in the Edit Template Data fields
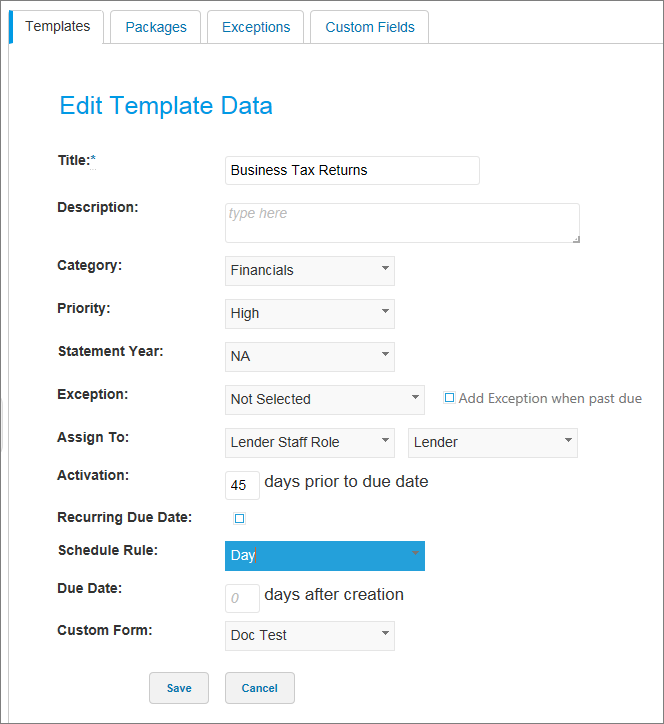
The Title is a required field.
Description field is available for text input.
The following fields are setup in the Custom Fields tab and may differ from the examples shown here:
Category
Priority
Statement Year
The Exception list is setup from the Exceptions tab.
Assign To allows you to choose who will be responsible for the Tickler.
Activation is how many days prior to the due date you want the Tickler to be active.
Enabling Recurring Due Date allows you to set up a tickler series which will regenerate the tickler every set due date. Selecting this option changes the function of the following fields:
Recurring Due Date Selected
Action |
Description |
|---|---|
Schedule Rule |
This field controls the frequency of recurring ticklers. For the Quarterly, Semi-Annual, and Yearly options, the Prompt For First Day of Reporting Cycle check box appears. This check box prompts a user to enter the start date of the reporting cycle being collected when the tickler is added to a customer. Note The Prompt For First Day of Reporting Cycle check box is automatically selected and cannot be cleared for the Quarterly and Semi-Annual options. It is optional when you select Yearly. |
Due Date |
This field establishes the recurring days, or dates, you wish the tickler to be due. The settings that appear in the field are specific to the frequency you choose in the Schedule Rule field. |
End Date |
This field determines how many recurrences of the tickler there will be. |
Recurring Due Date not Selected
Name |
Description |
|---|---|
Schedule Rule |
This field controls the date type for the tickler. |
Due Date |
This is the specific due date of the tickler. The settings that appear in the field are specific to the date type you choose in the Schedule Rule field. |
A Custom Form can be added if the System Administrator has these created for use.
After completing the Edit Template Data information, click Save.
Edit a Template
To edit a Template
Select the Template from the Templates tab.
Edit the information, and select the Save button.
Templates can also be duplicated by clicking the Duplicate button, or removed by clicking the Delete button.